Latest News

Showing posts with label Computer Tips. Show all posts

Customize folders with different colors in Windows

There are many softwares available today over the internet which can Customize your Computer in an efficient manner that it looks so attractive as well as it becomes very easy to use. We always want our computer to be clean and well organized so that whenever we need to access something or need to search a particular file/folder in our computer we could find it easily.


Also read "How to create a password protected folder using a batch script"


As similar to that, here I am going to share a software through which you can easily assign your favorite colors to your desired folders in order to differentiate them easily and to ease of access.

How do i Customize folders with different colors ?

Just follow the two simple steps given below to customize your folder :

Step 1 :

First of all Download and install the software FolderColorizer. It is tested and 100% virus free. You can download it from here : DOWNLOAD FOLDERCOLORIZER

Step 2 :

Now after installing the software, simply right click on any folder which you wish to customize. Here when you right click on folder, you will see a new option in the context menu i.e. Colorize !. Now simply go to that option and one submenu will appear. Now choose any color you want to assign to this folder.
Although it is a free software for everyone to use it but while you will use this software for the very first time , it will just ask your email id for activation of this software. But no need to worry because you wont need to confirm the activation by logging in to your e mail account. Even if you don’t wish to share your e mail id with developers of this software you can do it because product will be activated automatically once you enter any email id. So you can also enter any fake id if you want.
For your convenience I am providing you a screenshot of above mentioned procedure for changing folder color :

In this way you will be able to easily organize folders in any of your drive weather C: , D: or any other drive. You can also assign different colors to several folders in the same drive to give it more attractive and cool looks.


How to create a Password Protected Folder using a Batch Script

Keeping a Password Protected Folder make your data and files in the folder safe . As there are many softwares through which you can lock a folder but I there are many disadvantages in those softwares . These softwares consume more RAM where as this batch script doesn't take much memory to execute . The software needs to get installed and then it is used , But in Batch file script a simple procedure is used. So lets get started.


 Create a Password protected Folder

Follow the below steps to create a Password Protected folder .
  • First you need to create a Folder where you can host the files which are need to be protected .

Now navigate to that folder , open a text file in it. ( you can do this with right click--->New--->Text Document ).

Now copy the below script and paste it in the Text file

cls

@ECHO OFF

title Folder Private

if EXIST "HTG Locker" goto UNLOCK

if NOT EXIST Private goto MDLOCKER

:CONFIRM

echo Are you sure you want to lock the folder(Y/N)

set/p "cho=>"
if %cho%==Y goto LOCK
if %cho%==y goto LOCK
if %cho%==n goto END
if %cho%==N goto END
echo Invalid choice.
goto CONFIRM
:LOCK
ren Private "HTG Locker"
attrib +h +s "HTG Locker"
echo Folder locked
goto End
:UNLOCK
echo Enter password to unlock folder
set/p "pass=>"
if NOT %pass%== UR_PASSWORD goto FAIL
attrib -h -s "HTG Locker"
ren "HTG Locker" Private
echo Folder Unlocked successfully
goto End
:FAIL
echo Invalid password
goto end
:MDLOCKER
md Private
echo Private created successfully
goto End
:End

    Next change the Password "Ur Password" to your desired password and save the file as anything.bat ( like mylock.bat) .


  • If the file is being saved then delete the text file which you have created .
  • Now you need to Run the batch file .bat file , to Run it you need to double click on it . 

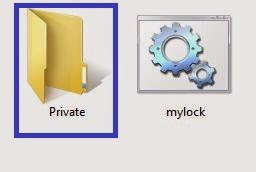
  • This batch file will create a Folder named Private . This the folder where you need to add the files and folders which are private or password protected .
  • Once you have finished adding all the files and images etc into the Private Folder then Run Batch file anything.bat again ( Just Double click on the .bat File ) .
  • Now a Black screen Command prompt window appears asking If you are sure you want to lock the folder . Now Press "Y" and hit enter to lock the folder .

  • Now the Folder Private disappears and your folder is hidden or password protected .

  • If you want to make the password protected folder Private a new windows pops asking to Enter password to Unlock Folder .

  • Now enter the same password which you have kept above , once you have entered the password Private folder reappears .If you have entered a wrong password the the window terminates .

Photoshop CS3 Shortcuts: PC

Here are many of Photoshop’s keyboard shortcuts. Some of them are the little known, hidden keystrokes! Download them as a PDF (nicely formatted single page that’s easily printed), or scroll down to the shortcut you need. Feel free to link to this page to share it with others! Enjoy...

Selecting
Draw Marquee from Center Alt-Marquee
Add to a Selection Shift
Subtract from a Selection Alt
Intersection with a Selection Shift-Alt
Make Copy of Selection w/Move tool Alt-Drag Selection
Make Copy of Selection when not in Move tool Ctrl-Alt-Drag Selection
Move Selection (in 1-pixel Increments) Arrow Keys
Move Selection (in 10-pixel Increments) Shift-Arrow Keys
Select all Opaque Pixels on Layer Ctrl-click on Layer Thumbnail (in Layers palette)
Restore Last Selection Ctrl-Shift-D
Feather Selection Ctrl-Alt-D or Shift-F6
Move Marquee while drawing selection Hold Space while drawing marquee
Viewing
Fit on Screen Double-click on Hand tool or Ctrl-0
100% View Level (Actual Pixels) Double-Click on Zoom Tool or Ctrl-Alt-0
Zoom in Ctrl-Space-Click or Ctrl-Plus(+)
Zoom out Alt-Space-Click or Ctrl-Minus(–)
Hide all tools and palettes Tab
Hide all palettes except Toolbox and Options bar Shift-Tab
Rotate through full screen modes F
Display menu bar when viewing in full-screen mode Shift-F (then press F to hide)
Scroll image left or right in window Ctrl-Shift-Page Up/Down
Jump/Zoom to part of Image Ctrl-drag in Navigator palette
Toggles layer mask on/off as rubylith \
Layer Shortcuts
Create new layer Ctrl-Shift-N
Select non-contiguous layers Ctrl-Click layers
Select contiguous layers Click one layer, then Shift-Click another layer
Delete Layer Delete key (while in the Move tool)
View contents of layer mask Alt-Click layer mask icon
Temporarily turn off layer mask Shift-Click layer mask icon
Clone layer as you move it Alt-Drag
Find/Select layer containing object Right-Click on the object w/Move tool
Change layer opacity Number pad keys (w/Move tool selected)
Cycle down or up through blend modes Shift-Plus(+) or Minus(–)
Change to a specific blend mode (w/Move tool) Shift-Alt-letter (ie: N=Normal, M=Multiply. etc.)
Switch to layer below/above current layer Alt-[ or Alt-]
Type Shortcuts
Select all text on layer Double-Click on T thumbnail in Layer palette
Increase/Decrease size of selected text by 2 pts Ctrl-Shift->/<
Increase/Decrease size of selected text by 10 pts Ctrl-Shift-Alt->/<
Increase/Decrease kerning/tracking Alt-Right/Left Arrow
Align text left/center/right Ctrl-Shift-L/C/R
Painting
Fill selection with background color Ctrl-Backspace
Fill selection with foreground color Alt-Backspace
Fill selection with foreground color using Lock Transparent Pixels Shift-Alt-Backspace
Fill selection with source state in History palette Ctrl-Alt-Backspace
Display Fill dialog box Shift-Backspace
Sample as background color Alt-Click w/Eyedropper tool
To get Move tool While in any painting/editing tool-hold Ctrl
To get Eyedropper with Paint tools Alt
Change paint opacity (with Airbrush OFF) Number keys
Change paint opacity (with Airbrush ON) Shift-Number keys
Change Airbrush flow (with Airbrush ON) Number keys
Change Airbrush flow (with Airbrush OFF) Shift-Number keys
Cross-Hair Cursor Any painting/editing tool-turn Caps Lock on
Decrease/Increase Brush Size [ or ]
Decrease/Increase Hardness of Brush Shift-[ or Shift-]
Switch between preset Brushes < or >
Open Brushes pop-up palette Right-Click in Image window
Erase to History palette’s source state Alt-Eraser
Cycle down or up through blend modes Shift-Plus(+) or Minus(–)
Change to a specific blend mode Shift-Alt-letter (ie: N=Normal, M=Multiply, etc.)
Create fixed color target from within a dialog box Shift-Click in image window
Delete fixed color target Alt-Click on target with Color Sampler tool
Create new spot-color channel from current selection Ctrl-Click on New Channel button in Channels palette
Pen Tool Shortcuts
To get Direct Selection tool while using Pen Ctrl
Switch between Add-Anchor and Delete-Anchor Point tools Alt
Switch from Path Selection tool to Convert Point tool when pointer is over anchor point Ctrl-Alt
To Select a whole path w/Direct Selection tool Alt-click
Convert path to a selection Ctrl-click on path name (in Paths palette)
Palette Shortcuts
Show/Hide Brushes palette F5
Show/Hide Color palette F6
Show/Hide Layers palette F7
Show/Hide Info palette F8
Show/Hide Actions palette Alt-F9
Open Adobe Bridge Ctrl-Alt-O
Other Shortcuts
Switch between open documents Ctrl-Tab
Undo or Redo operations beyond last one Ctrl-Alt-Z/Ctrl-Shift-Z
Apply Last Filter Ctrl-F
Opens Last Filter Dialog Box Ctrl-Alt-F
Hand Tool Spacebar
Reset Dialog Box Hold Alt, Cancel turns into Reset Button, Click it
Increase/Decrease value (in any option field) by 1 unit Up/Down Arrow
Increase/Decrease value (in any option field) by 10 units Shift-Up/Down Arrow
Replay last Transformation Ctrl-Shift-T
Measure Angle between Lines (Protractor Function) After ruler is drawn, Alt-Drag end of line with Ruler Tool
Move Crop Marquee while creating Hold Space while drawing
Snap Guide to Ruler ticks Hold Shift while dragging
Highlight Fields in Options bar (n/a for all tools) Enter
Don’t Snap object edge while moving Hold Control while dragging
Tools
V Move
M Rectangular Marquee, Elliptical Marquee
L Lasso tools
W Quick Selection, Magic Wand
C Crop
K Slice tools
J Spot Healing Brush, Healing Brush, Patch, Red Eye
B Brush, Pencil, Color Replacement
S Clone Stamp, Pattern Stamp
Y History Brush, Art History Brush
E Eraser tools
G Gradient, Paint Bucket
R Blur, Sharpen, Smudge
O Dodge, Burn, Sponge
P Pen tools
T Type tools
A Path Selection, Direct Selection
U Rectangle, Rounded Rectangle, Ellipse, Polygon, Line, Custom Shape
N Notes tools
I Eyedropper, Color Sampler, Ruler, Count
H Hand
Z Zoom
X Switch Foreground and Background colors
D Default colors
Q Quick Mask Mode
F Cycle through screen modes
To switch between all tools within groups, add the Shift key to the letters above
For example, to switch between rectangular and elliptical marquee hit Shift-M

Please like our facebook page and keep Visiting Our Blog .

How to Make loading fast your computer


1. Remove Unwanted Startup Items.

  • Go to Start >> run
  • Then type msconfig
  • navigate startup tab
  • Keep Antivirus, instant messenger, and other important application to load system tray 
  • Remove unwanted application. It will pull down your PC Performance .

2. Fixing Hard disk Error 


  • Go to the start>> run 
  • type CMD and hit enter
  • It check disk command checks error in HDD and fixes it 
  • now fix erroes in other drives  D,E,F ..... 
  • Type CHKDSK/F  for the other than C and fix HDD error. 


Big Boss
Happy Bloging !! :)
Please like our facebook page and keep Visiting Our Blog .

How to Fix Printer Errors: Tips


Printers can be terribly frustrating if they are found faulty. However, some easy techniques can solve hundreds of printer issues comfortably. Remote computer help( +Rami Saarikorpi )services provide support for fixing your irritating printer issues. With interactive solutions you not only solve the issues but you also become a technician for your own printer in the process.
The session of troubleshooting your printer issues with the online remote tech support providers can also be frustrating. The severity of the frustration can be increased if the computer help experts fail to diagnose the problem. Sometimes they start with the common aspects of the printer problems to detect the root of the problem. If they can't diagnose it immediately, you need not lose heart. They might provide you with a manual book or supportive diagram to detect the problem. You may need to go through such pages to see whether same kinds of problems are being occurred on your printer too. That is why it is always important that you should consult a good and specialized tech support experts.

If you notice that you are not being able to turn on the printer or if you can't take a print out of your printer all on a sudden, computer help experts suggest you to implement some tips at the very first. Tech support guys suggest you to check the printer connectivity. Make sure the printer is on and is getting power to be run. Check whether the green light or the indicator is on or not. If you see no indicator you need to check the power outset to ensure the printer is getting the power connection. If everything is fine here you need to try your hand on some other places too. In such case, you can give your PC a reboot. Rebooting a system resolves a number of issues many times. So, give it a try to see whether it clicks.
If you still see the problem, it is time to check with the program setting of the printer. You need to go to the start menu and then to the settings of Printer/Faxes. You need to right click on the menu and select the option 'set as default'. Now you need to try to take a test print out. If it does not come out the problem is still there. Then computer help guys suggest you to switch off the printer and then connect it once again. When you turn the printer on, you need to check whether any error message is shown on the computer screen. Take note of any error message because it will direct to the solutions even if you ask for a help from the remote computer support.

Tech support experts now suggest you to check the ink cartridge. Problems can be generated from here too. Cases of dried ink or problems in installation can be the culprit. If the inside part is dusty then also the problem can occur. So, you need to clean up the printer using some kind of spray to air remove the dust. Some professionals also suggest that papers can be another reason for printer problem. Some papers, specially the cheaper ones sometimes can not be feed properly and make the paper jam as a result. Ensure that everything is fine here too.


Happy Bloging !! :)
Back To HOME
Please like our facebook page and keep Visiting Our Blog .

How to Download Temple Run for Computer PC


download temple run on computer pc laptop install
Temple Run is the most popular Games on android these days. But sometimes you need to download and install Temple Run for PC. Though the game developer has not released this game for computer or pc officially, but using Android emulator we can play Temple run on computers.
Although playing and Free download Temple Run on Computer is not official but using tricks I have described below will certainly help you to play Temple run on your computer. Remember and follow each steps I have mentioned.
Ideally this will be same Temple Run game which you are playing on your Android device, we will be using a great Android emulator called BlueStack and download Temple run on computer with apk file which can be used to Play Temple run on laptop or pc.
Benefits of playing Temple Run on computer or PC
  • Same look and feel like your Android
  • Very easy to play
  • Same Hardware can be used, no extra hardware cost involved
  • Instructions are same and quite easy to follow

How to Download Temple Run for Laptop or Computer PC

In order to play Temple Run on Computer or PC you first need to download the game on your computer or laptop. For that you first need to have bluestack software installation files and once you download and install bluestack you may need to restart your computer.
.

How to do Installation of Temple Run on computer pc or Laptop

Now you are almost ready to Play Temple Run on Computer pc or laptop. Just follow steps to download and install temple run on computer and you are ready to play the game which you are playing on your android.
  1. As mention above, Download and Install Bluestack software on your computer
  2. Restart your computer if asked
  3. Download .apk file
  4. Open temple run apk file using bluestack software
  5. Installation process will start for Temple run
  6. Enjoy playing Temple run on your computer pc or laptop.

How to Download Temple Run apk file on computer pc

Once you have done Installation of bluestack you can download apk file for Temple run to play this android game on your computer pc or laptop. You can download apk file directly from Google Play or other sources over internet.

Download Temple Run APK File
So, now you are ready to Play Temple run on your computer or laptop. I have tried to explain step by step installation process, but still if you face difficulties you can comment or message me. Enjoy playing.

click below to watch how to install Game on PC


Keyboard shortcut keys for Windows

Hello to all visitor ,
Getting familiar with keyboard shortcuts not only help you get the work done faster, but also more efficient. If your daily job rely heavily on using Windows, here are some 100+ Windows Keyboard Shortcuts you might want to check out. If there’s any nifty shortcuts we have missed, appreciate a heads up.

The General Shortcuts

We’ll kickoff the list with some really general shortcuts that you often used.
  • CTRL+C (Copy)
  • CTRL+X (Cut)
  • CTRL+V (Paste)
  • CTRL+Z (Undo)
  • Delete (Delete)
  • Shift+Delete (Delete the selected item permanently without placing the item in the Recycle Bin)
  • CTRL while dragging an item (Copy the selected item)
  • CTRL+Shift while dragging an item (Create a shortcut to the selected item)
  • F2 key (Rename the selected item)
  • CTRL+RIGHT ARROW (Move the insertion point to the beginning of the next word)
  • CTRL+LEFT ARROW (Move the insertion point to the beginning of the previous word)
  • CTRL+DOWN ARROW (Move the insertion point to the beginning of the next paragraph)
  • CTRL+UP ARROW (Move the insertion point to the beginning of the previous paragraph)
  • CTRL+Shift with any of the arrow keys (Highlight a block of text)
  • Shift with any of the arrow keys (Select more than one item in a window or on the desktop, or select text in a document)
  • CTRL+A (Select all)
  • F3 key (Search for a file or a folder)
  • Alt+Enter (View the properties for the selected item)
  • Alt+F4 (Close the active item, or quit the active program)
  • Alt+Enter (Display the properties of the selected object)
  • Alt+Spacebar (Open the shortcut menu for the active window)
  • CTRL+F4 (Close the active document in programs that enable you to have multiple documents open simultaneously)
  • Alt+Tab (Switch between the open items)
  • Alt+ESC (Cycle through items in the order that they had been opened)
  • F6 key (Cycle through the screen elements in a window or on the desktop)
  • F4 key (Display the Address bar list in My Computer or Windows Explorer)
  • B (Display the shortcut menu for the selected item)
  • B (Display the System menu for the active window)
  • CTRL+ESC (Display the Start menu)
  • Alt+Underlined letter in a menu name (Display the corresponding menu)
  • Underlined letter in a command name on an open menu (Perform the corresponding command)
  • F10 key (Activate the menu bar in the active program)
  • RIGHT ARROW (Open the next menu to the right, or open a submenu)
  • LEFT ARROW (Open the next menu to the left, or close a submenu)
  • F5 key (Update the active window)
  • Backspace (View the folder one level up in My Computer or Windows Explorer)
  • ESC (Cancel the current task)
  • Shift when you insert a CD-ROM into the CD-ROM drive (Prevent the CD-ROM from automatically playing)


Dialog Box Keyboard Shortcuts

  • CTRL+Tab (Move forward through the tabs)
  • CTRL+Shift+Tab (Move backward through the tabs)
  • Tab (Move forward through the options)
  • Shift+Tab (Move backward through the options)
  • Alt+Underlined letter (Perform the corresponding command or select the corresponding option)
  • Enter (Perform the command for the active option or button)
  • Spacebar (Select or clear the check box if the active option is a check box)
  • Arrow keys (Select a button if the active option is a group of option buttons)
  • F1 key (Display Help)
  • F4 key (Display the items in the active list)
  • Backspace (Open a folder one level up if a folder is selected in the Save As or Open dialog box)

Microsoft Natural Keyboard Shortcuts

  • Win (Display or hide the Start menu)
  • Win+BREAK (Display the System Properties dialog box)
  • Win+D (Display the desktop)
  • Win+M (Minimize all of the windows)
  • Win+Shift+M (Restore the minimized windows)
  • Win+E (Open My Computer)
  • Win+F (Search for a file or a folder)
  • CTRL+Win+F (Search for computers)
  • Win+F1 (Display Windows Help)
  • Win+ L (Lock the keyboard)
  • Win+R (Open the Run dialog box)
  • Win+U (Open Utility Manager)

Accessibility Keyboard Shortcuts

  • Right Shift for eight seconds (Switch FilterKeys either on or off)
  • Left Alt+left Shift+PRINT SCREEN (Switch High Contrast either on or off)
  • Left Alt+left Shift+NUM LOCK (Switch the MouseKeys either on or off)
  • Shift five times (Switch the StickyKeys either on or off)
  • NUM LOCK for five seconds (Switch the ToggleKeys either on or off)
  • Win +U (Open Utility Manager)

Windows Explorer Keyboard Shortcuts

  • END (Display the bottom of the active window)
  • HOME (Display the top of the active window)
  • NUM LOCK+* (Display all of the subfolders that are under the selected folder)
  • NUM LOCK++ (Display the contents of the selected folder)
  • NUM LOCK+- (Collapse the selected folder)
  • LEFT ARROW (Collapse the current selection if it is expanded, or select the parent folder)
  • RIGHT ARROW (Display the current selection if it is collapsed, or select the first subfolder)

Shortcut Keys for Character Map

  • After you double-click a character on the grid of characters, you can move through the grid by using the keyboard shortcuts:
  • RIGHT ARROW (Move to the right or to the beginning of the next line)
  • LEFT ARROW (Move to the left or to the end of the previous line)
  • UP ARROW (Move up one row)
  • DOWN ARROW (Move down one row)
  • PAGE UP (Move up one screen at a time)
  • PAGE DOWN (Move down one screen at a time)
  • HOME (Move to the beginning of the line)
  • END (Move to the end of the line)
  • CTRL+HOME (Move to the first character)
  • CTRL+END (Move to the last character)
  • Spacebar (Switch between Enlarged and Nor mal mode when a character is selected)

Microsoft Management Console (MMC) Main Window Keyboard Shortcuts

  • CTRL+O (Open a saved console)
  • CTRL+N (Open a new console)
  • CTRL+S (Save the open console)
  • CTRL+M (Add or remove a console item)
  • CTRL+W (Close window/tab)
  • F5 key (Update the content of all console windows)
  • Alt+Spacebar (Display the MMC window menu)
  • Alt+F4 (Close the console)
  • Alt+A (Display the Action menu)
  • Alt+V (Display the View menu)
  • Alt+F (Display the File menu)
  • Alt+O (Display the Favorites menu)

MMC Console Window Keyboard Shortcuts

  • CTRL+P (Print the current page or active pane)
  • Alt+- (Display the window menu for the active console window)
  • Shift+F10 (Display the Action shortcut menu for the selected item)
  • F1 key (Open the Help topic, if any, for the selected item)
  • F5 key (Update the content of all console windows)
  • CTRL+F10 (Maximize the active console window)
  • CTRL+F5 (Restore the active console window)
  • Alt+Enter (Display the Properties dialog box, if any, for the selected item)
  • F2 key (Rename the selected item)
  • CTRL+F4 (Close the active console window. When a console has only one console window, this shortcut closes the console)

Remote Desktop Connection Navigation

  • CTRL+Alt+END (Open the m*cro$oft Windows NT Security dialog box)
  • Alt+PAGE UP (Switch between programs from left to right)
  • Alt+PAGE DOWN (Switch between programs from right to left)
  • Alt+INSERT (Cycle through the programs in most recently used order)
  • Alt+HOME (Display the Start menu)
  • CTRL+Alt+BREAK (Switch the client computer between a window and a full screen)
  • Alt+Delete (Display the Windows menu)
  • CTRL+Alt+- (Place a snapshot of the active window in the client on the Terminal server clipboard and provide the same functionality as pressing PRINT SCREEN on a local computer.)
  • CTRL+Alt++ (Place a snapshot of the entire client window area on the Terminal server clipboard and provide the same functionality as pressing Alt+PRINT SCREEN on a local computer.)

Internet Explorer navigation

  • CTRL+B (Open the Organize Favorites dialog box)
  • CTRL+E (Open the Search bar)
  • CTRL+F (Start the Find utility)
  • CTRL+H (Open the History bar)
  • CTRL+I (Open the Favorites bar)
  • CTRL+L (Open the Open dialog box)
  • CTRL+N (Start another instance of the browser with the same Web address)
  • CTRL+O (Open the Open dialog box, the same as CTRL+L)
  • CTRL+P (Open the Print dialog box)
  • CTRL+R (Update the current Web page)
  • CTRL+W (Close the current window)


Happy Bloging !! :)
Back To HOME 

Download Run Command keys

नमस्ते सम्पूर्ण ब्लग Visitor हरु मा । आज भोलि को जमाना मा को होला कम्प्युटर प्रयोग नगर्ने ? होला कोहि गाउँ बंसी हरु । आज भोलि शहर का साना साना बाल बालिका देखि लिएर सिर भुई मा छुन लागेकाहरु दिन रात कम्प्युटर मा झुन्डिरहन्छन थाहा भएकै कुरा हो ।

Read also :- How to remove Temp file from your computer??

धेरै जसो Computer use गर्ने मानिस हरुलाई Run Commands को जानकारी छैन होला । जुन आज म तपाइँहरुलाई दिन गैरहेको छु । जसको लागि यहाँ जानुहोस त्यहाँ सम्पूर्ण जानकारीहरु दिएका छन् तपाई Download पनि गर्न सक्नु हुन्छ जसको  लागी यहाँ click गर्नुहोस ।

Happy Bloging !! :)
Please like our facebook page and keep Visiting Our Blog .

How to remove Temp file from your computer??

Hi budys today I'm going to post "How to delete temp file from your computer" and make your computer fast. This is a fantastic tutorial for my main articles where most of the time we provide steps like remove the temp files other not necessaries files, cache, prefect etc as a part of troubleshooting procedure in our comouter . In order to avoid writing the same steps again and again in every guides, I prefer to write a detailed guide on removal of temporary files and cache files from Windows computer. Please note that many recommends to delete the below listed files in safe mode for the perfect completion of the task but we can do the same in normal mode too.

How to Clear Temp files in Windows 7 Computer

In order to clear temporary files in Windows 7 computer follow the simple steps below with me .

1. Click on Windows Start button

2. Click on Run or Press (Widows key+r)

3. Type temp on Run and press enter

4. Delete all files listed on there

5. Now Again type %temp% on Run and press enter

6. Delete files listed here too

Please note that the files currently under use cannot be deleted and may show an error message.like this

check mark ther ( do this for all current items) after check mark click Skip button

Empty Prefect Folder

Prefetch folder contain files which tell how the software installed in your computer works. Normally you do not need to delete files in this folder. In case if you want to delete files in prefect folder follow the steps below.

1. Click on Windows Start

2. Click on Run or Press (Widows key+r)

3. Type prefetch and press Enter

4. Delete the files

You have done it help you to run smoothly your computer.
also check this.
Windows 7 Themes download Free
Happy Bloging !! :)
Back To HOME
Please like our facebook page and keep Visiting Our Blog .

Nepali font for mobile

Hi friends Today I get one useful links for Nepali people, Who tired to searching "Nepali Font" on Mobile. 
We know maximum mobile  have not installed Nepali or hindi font , so we can't type Nepali font in Nepali . I found 2 software which you can use . These software are below....


  • Painini Keypad

This software so easy to use because its work all java mobiles and on Nokia E-series too. 
Download this software click from here 


  • Indi SMS

This works on Nokia Symbian, Java Mobile or Sony Ericssion al all . 
Download this software click from here 


If you want to type Nepali on your computer then read my previous post "Type anywhere in Nepali language"


How to Keep Your Computer Running Fast and Smooth


It is really easy to keep your computer running like new if you just do a little regular maintenance. If you have already let it go, don't worry, you can bring back the performance the computer had when it was new and then keep it that way. There are only a few simple problems that slow down most computers. Read on and you will learn how to correct those problems and then make sure they never bother you again


Instructions

    • 1
      Keep Your Desktop and Hard Disk Tidy
      Is your computer desktop your virtual dumping group? Storing files and/or lots of shortcuts on your computer's desktop will demand more memory from the computer. It is ok to keep some commonly used items here (or better yet shortcuts) but don't make a habit of sprawling out all of your work on the Desktop. If you deal with a lot of documents or files on a regular basis, create a temporary work folder instead of littering the desktop.

      If you are big on downloading software, videos or music, be sure to clean up after yourself. Don't leave setup programs or media files on your hard disk that you are never going to use again; this just wastes your computer's valuable disk space. Likewise, do not let your recycle bin or various temporary file folders fill up and fill your hard disk. If your disk space gets too low for any of these reasons, performance problems are sure to follow.
      To easily empty your recycle bin and various temporary file folders, such as your temporary Internet folder, use Window's build in "Disk Cleanup" utility. Access the "Disk Cleanup" utility by clicking:
      Start - > All Programs - > Accessories - > System Tools - > Disk Cleanup
      The tool is very easy to use; simply check the boxes next to the categories of files you would like to remove from your computer. There is one option to avoid however: "Compress Old Files". This is meant to save disk space if a drive is running very low, but for this option, saved space is traded for performance.
    • 2
      De-fragment Your Hard Disk Regularly
      The way your computer stores files to the hard disk is a lot less pretty than what you see in your Windows Explorer file browser. The Windows operating system translates the digital mess of what is actually recorded on your hard disk so you can understand it. It also translates your clicks, drags and keystrokes into instructions the hard disk understands. The hard disk is read and written to in a sequence and through references rather than through the directory tree structure you may be familiar with. There are also many hidden files and some abstract data recorded to your hard disk that Windows constantly accesses.
      Over time, with perpetual reads and writes to the hard disk, the way that the data is organized there becomes less and less efficient. For example, a digital photo you have saved may be split up into a dozen or more segments and an instruction set for associating and locating those pieces. YES! WHAT A MESS! Also, files that your computer needs to access very frequently may be stored on a part of the hard disk that is the slowest to read, while your report on Dinosaurs from the 3rd grade (or some other equally obscure file you'll never look at again) is stored on the fastest part of the disk. When your hard disk gets in this gross state of disorder it is said to be fragmented, and your computer begins to crawl.
      Fortunately, Windows has a built in tool, "Disk Defragmenter", which can correct the data fragmentation on your hard disk fairly quickly. The tool can be accessed by clicking:
      Start - > Programs - > Accessories - > System Tools - > Disk Defragmenter
      The program is very easy to use. Once you have started "Disk Defragmenter", all you have to do is click the "Defragment" button and let it do its magic. The time the process takes to complete depends on how bad the fragmentation of your hard disk is. If you have not "defragged" your hard disk before, you will probably see an improvement in your computers performance as soon as the process is complete.
      Note: Complete Step 1 before defragmenting your hard disk since there is no sense in rearranging data you are going to delete anyway. Failing to do so will also unnecessarily slow down the defragmentation process.
      Note: You can defragment your hard disk as often as you like. The more often you do so, the less time it will take.
    • 3
      Keep Your Computer Free from Viruses (and other unwanted software)
      If you are connected to the Internet, it is just too easy to come into contact with malicious computer viruses. Some viruses will slow down your computer and maybe corrupting your favorite files, while others will complete destroy your computer's software and render the machine useless. Therefore, it is essential that your computer be equipped with modern anti-virus software. There are many anti-virus packages to choose from, so consult with friends and hit the web to see which packages people have had the most success with.
      Whether you pick a brand name or opt for a freebee, make sure you keep the anti-virus software's "definitions" up to date. Virus definitions let the anti-virus software distinguish known viruses from other software. New virus threats are constantly emerging, so it is essential for your anti-virus software to have a feature that regularly updates these definitions.
      Computer viruses are not the only annoyances that can plague your computer experience. Two other groups of unwanted software, adware and spyware, can slow down your system. These types of software are not technically viruses because their purpose is not purely malicious. Adware is designed to advertise products and services to you through your computer, while spyware is designed to capture information from your system and transmit it to someone else. Obviously, you do not want any of this software running on your computer, irregardless of the fact that it will contribute to a computer's sluggish performance.
      Some anti-virus software packages are bundled with anti-adware and spyware software, and there are other packages solely devoted to detecting and removing this type of software. Again, do some research because there are many choices. As with the anti-virus software, these detection and removal tools need to be kept up to date to be effective.
    • 4
      Make All of the Above Easy
      Even if you are fairly technically savvy, but especially if you're not, you probably wondering, "how often do I have to do ALL of that?", and "will it be worth it?" Well, you can make sure all of these things get done everyday, or even more often, with just a little up-front work. "Set it and forget it" sort-to-speak.
      Everything mentioned in steps 1 through 3 can be automated using Window's built in feature to schedule tasks, and a simple batch file. Batch files contain a set of instructions for your computer to follow, which can be called upon at a specific and recurring time by Window's "Scheduled Tasks" manager.
      How to Create a Batch Files:
      To create a batch file:
      Click Start - > Run
      Enter "notepad"
      Click "Ok".
      The notepad editor will appear.
      Type out the commands you want completed, in order and each on a separate line.
      (Specific commands will be mentioned below)
      Next, save the file by clicking:
      File - > Save
      Save the file to a location and with a name you will remember. As an example, you could save the file under "C:\" and call it "maintenance.bat".
      Be sure to change the "save as type" from the default of "Text Documents" to "All Files", and to include the ".bat" as part of the filename.
      Note: To later make changes or corrections to the batch file, locate it, right click it and select "edit" at any later date.
    • 5
      Automatic Disk Cleanup:
      So that "Disk Cleanup" can be included in your automated maintenance, you must first set the options you would like the "Disk Cleanup" utility to use when "Scheduled Tasks" executes it. To set these options:
      Click Start - > Run
      Type "cleanmgr /sageset:1"
      Click the "ok" button
      The "Disk Cleanup Settings" windows will appear.
      Check off the items you want automatically cleaned up, as described in step 1 above.
      Click the "ok" button
      The settings are now saved.
      To include "Disk Cleanup" in your automated process, save the command "cleanmgr /sagerun:1" in your batch file.
    • 6
      Automatic Defrag:
      Including a hard disk defrag in your automated process simply requires another entry in your batch file. Include a line that reads, "defrag c:" in the batch and you are done. Remember to include this line after the "Disk Cleanup" command, as this will speed up your whole maintenance process.
    • 7
      Stay Virus Free:
      The specifics on how to include regular definition updates and scans for viruses, adwares and spywares is entirely dependant on the programs you have chosen for these tasks, but most can usually be initiated from a batch file. Consult with your vendors' websites or support staff. If any of these products cannot be initiated from your batch file, they probably have a built in means of scheduling the same important tasks.
    • 8
      Schedule It!:
      Once your batch file is complete, you can easily test it. Simply double click the batch file and it should complete all of the tasks you included. Note that it may take some time for the process to complete. If you have trouble, it may help to add the command "pause" at the end of the batch file so you can see where you went wrong.
      If there is no convenient and regular time for you to schedule your batch file, you can continue to manually execute just as you did to test it. Another option is to include the command, "shutdown -s -f" at the very end of the batch file, which will turn off your computer after all of the commands are complete. Each time you are done using your computer for the day, close all of your programs and double click your batch file; your computer will take care of its maintenance and then power-down.
      If there is a convenient time for your maintenance to be performed, perhaps in the middle of the night if your computer is left on, you can use Window's "Scheduled Tasks" feature to make your batch file execute automatically at that time. When scheduling, remember to allow enough time for all of the tasks to complete before you will need to use the computer again.
      To schedule a task in Windows click:
      Start - > All Programs - > Accessories - > System Tools - > Scheduled Tasks
      Double-Click "Add Scheduled Task"
      Click "Next"
      Click "Browse"
      Locate and select your batch file
      Click "Open"
      Select how often you would like your batch file executed
      Click "Next"
      Select the time you would like the batch file executed
      Click "Next"
      Enter the username and password for your computer if you have one
      Click "Next"
      Click "Finished"
      The tasks you have defined will now run on a regular basis as you have specified. If you have included all of the tasks suggested above, you computer should run relatively trouble free for years to come.
      Hope this post teaches you many thing about Computer .

      Enjoy!!