Latest News

Showing posts with label Blog tips. Show all posts

Basic Image Slider Widget for Blogger 'FlexSlider'

Hello to all Blogger. This is a responsive j Query Flex image slider. This simple but amazing slider developed by woothemes.com. It Awesome. It has some really nice features that makes you like it. The most cool feature is it is extremely responsive and lightweight; you don't have to tensed about
the sliders width / height even all images width and height are auto adjustable. Here it is customized for blogger/blogspot so you can just copy and paste the code to install on your blogger blog. Check out the live demo below.


Let's Install the flexSlider Image Slider Widget in Blogger

  1. Go to Blogger Dashboard > Layout> Add a Gadget Select Html/Javascript
  2. Copy the code below and paste on it.

<!-- SLIDER CSS -->
<style type="text/css">
/*
* jQuery FlexSlider v2.2.0
* http://www.woothemes.com/flexslider/
*
* Copyright 2012 WooThemes
* Free to use under the GPLv2 license.
* http://www.gnu.org/licenses/gpl-2.0.html
*
* Contributing author: Tyler Smith (@mbmufffin)
*/


/* Browser Resets
*********************************/
.flex-container a:active,
.flexslider a:active,
.flex-container a:focus,
.flexslider a:focus {outline: none;}
.slides,
.flex-control-nav,
.flex-direction-nav {margin: 0; padding: 0; list-style: none;}


/* FlexSlider Necessary Styles
*********************************/
.flexslider li {
border: 0 none !important;
padding: 0 !important;
text-indent: 0 !important;
margin-bottom: 0 !important;
}
.flexslider {margin: 0; padding: 0;}
.flexslider .slides > li {display: none; -webkit-backface-visibility: hidden;} /* Hide the slides before the JS is loaded. Avoids image jumping */
.flexslider .slides img {width: 100%; display: block;}
.flexslider .slides, .flexslider .slides img, .flex-direction-nav { margin: 0 !important; padding: 0 !important; }
.flex-pauseplay span {text-transform: capitalize;}

/* Clearfix for the .slides element */
.slides:after {content: "\0020"; display: block; clear: both; visibility: hidden; line-height: 0; height: 0;}
html[xmlns] .slides {display: block;}
* html .slides {height: 1%;}

/* No JavaScript Fallback */
/* If you are not using another script, such as Modernizr, make sure you
* include js that eliminates this class on page load */
.no-js .slides > li:first-child {display: block;}

/* FlexSlider Default Theme
*********************************/
.flexslider { margin: 0 0 60px; background: #fff; border: 4px solid #fff; position: relative; -webkit-border-radius: 4px; -moz-border-radius: 4px; -o-border-radius: 4px; border-radius: 4px; -webkit-box-shadow: 0 1px 4px rgba(0,0,0,.2); -moz-box-shadow: 0 1px 4px rgba(0,0,0,.2); -o-box-shadow: 0 1px 4px rgba(0,0,0,.2); box-shadow: 0 1px 4px rgba(0,0,0,.2); zoom: 1; }
.flex-viewport { max-height: 2000px; -webkit-transition: all 1s ease; -moz-transition: all 1s ease; -o-transition: all 1s ease; transition: all 1s ease; }
.loading .flex-viewport { max-height: 300px; }
.flexslider .slides { zoom: 1; }
.carousel li { margin-right: 5px; }

/* Direction Nav */
.flex-direction-nav {*height: 0;}
.flex-direction-nav a { text-decoration:none; display: block; width: 40px; height: 45px; margin: -20px 0 0; position: absolute; top: 50%; z-index: 10; overflow: hidden; opacity: 0; cursor: pointer; color: rgba(0,0,0,0.8); text-shadow: 1px 1px 0 rgba(255,255,255,0.3); -webkit-transition: all .3s ease; -moz-transition: all .3s ease; transition: all .3s ease; }
.flex-direction-nav .flex-prev { background: url("http://project.dimpost.com/flexslider-basic/img/arrows1.png") no-repeat scroll -15px -92px transparent; left: -50px; }
.flex-direction-nav .flex-next { background: url("http://project.dimpost.com/flexslider-basic/img/arrows1.png") no-repeat scroll -15px -15px transparent; right: -50px; text-align: right; }
.flexslider:hover .flex-prev { opacity: 0.5; left: 10px; }
.flexslider:hover .flex-next { opacity: 0.5; right: 10px; }
.flexslider:hover .flex-next:hover, .flexslider:hover .flex-prev:hover { opacity: 0.9; }


/* Pause/Play */
.flex-pauseplay a { display: block; width: 20px; height: 20px; position: absolute; bottom: 5px; left: 10px; opacity: 0.8; z-index: 10; overflow: hidden; cursor: pointer; color: #000; }
.flex-pauseplay a:before { font-family: "flexslider-icon"; font-size: 20px; display: inline-block; content: '\f004'; }
.flex-pauseplay a:hover { opacity: 1; }
.flex-pauseplay a.flex-play:before { content: '\f003'; }

/* Control Nav */
.flex-control-nav {width: 100%; position: absolute; bottom: -40px; text-align: center;}
.flex-control-nav li {margin: 0 6px; display: inline-block; zoom: 1; *display: inline;}
.flex-control-paging li a {width: 11px; height: 11px; display: block; background: #666; background: rgba(0,0,0,0.5); cursor: pointer; text-indent: -9999px; -webkit-border-radius: 20px; -moz-border-radius: 20px; -o-border-radius: 20px; border-radius: 20px; -webkit-box-shadow: inset 0 0 3px rgba(0,0,0,0.3); -moz-box-shadow: inset 0 0 3px rgba(0,0,0,0.3); -o-box-shadow: inset 0 0 3px rgba(0,0,0,0.3); box-shadow: inset 0 0 3px rgba(0,0,0,0.3); }
.flex-control-paging li a:hover { background: #333; background: rgba(0,0,0,0.7); }
.flex-control-paging li a.flex-active { background: #000; background: rgba(0,0,0,0.9); cursor: default; }

.flex-control-thumbs {margin: 5px 0 0; position: static; overflow: hidden;}
.flex-control-thumbs li {width: 25%; float: left; margin: 0;}
.flex-control-thumbs img {width: 100%; display: block; opacity: .7; cursor: pointer;}
.flex-control-thumbs img:hover {opacity: 1;}
.flex-control-thumbs .flex-active {opacity: 1; cursor: default;}

@media screen and (max-width: 860px) {
.flex-direction-nav .flex-prev { opacity: 1; left: 10px;}
.flex-direction-nav .flex-next { opacity: 1; right: 10px;}
}
</style>

<!-- SLIDER HTML -->
<div id="flex-isfb">
<!-- Preloader -->
<div id="preloader"></div>
<style>
/* Preloader */
#preloader {
position: absolute;
top:0;
left:0;
right:0;
bottom:0;
background-color:#fff; /* change if the mask should have another color then white */
z-index:999999999999; /* makes sure it stays on top */
}

</style>
<div class="flexslider">
<ul class="slides">
<li>
<a href="#">
<img src="http://upload.wikimedia.org/wikipedia/commons/3/36/Hopetoun_falls.jpg" />
</a>
</li>
<li>
<a href="#">
<img src="http://upload.wikimedia.org/wikipedia/commons/1/1a/Bachalpseeflowers.jpg" />
</a>
</li>
<li>
<a href="#">
<img src="http://tmacfitness.com/wp-content/uploads/2013/04/Beauty-of-nature-random-4884759-1280-800.jpg" />
</a>
</li>
</ul>
</div>
</div>

<!-- SLIDER JS -->
<script src="http://ajax.googleapis.com/ajax/libs/jquery/1/jquery.min.js"></script>
<script src="http://project.dimpost.com/flexslider-basic/js/jquery.flexslider-min.js"></script>
<script type="text/javascript">
$(window).load(function(){
$('.flexslider').flexslider({
animation: "slide",
controlNav: true,
directionNav: true,
easing: "swing",
slideshowSpeed: 3000,
animationSpeed: 600,
});
});
//<![CDATA[
$(window).load(function() {
$('#preloader').delay(350).fadeOut('slow');
})
//]]>
</script>
   
           3. Save, and we are done.

NOTE:
Forget about width and height it will adjust auto.
Replace the pink colored image URL with your own uploaded image URL(You can upload image on blogspot, flickr etc.)
There is some other things you may want to play with, see below. I guess I don't have to explain that because they are named like as they are. Play with them...

   animation: "slide",
  controlNav: true,
  directionNav: true,
  easing: "swing",
  slideshowSpeed: 3000,    
  animationSpeed: 600, 
Happy blogging!!!  Don't Forget to share on Social Network

How to Show Blogger Widgets in HomePage Only

Hello to every one, 
This post explains how to show the Blogger widgets( like links,ads,etc) on your blogspot blog Homepage Only.

Usually, by default.. when we add a widget item like link units, profile, Archives, ads,Pictures,etc in Blogger blog , it will be displayed in every page of the blog including the homepage, Permalink pages,etc. As you can see, I installed "awesome instrumental" wedge on my blog which will be displayed only home pages of the blog.
 If you want to do so, this tip will come help you simple to do this...


/span>

Show gadget only HOMEPAGE in Blogger:


→Log in to your dashboard--> layout--> Page Elements

→Click on add a Gadget on the sidebar of the sidebar. select the type of fadget you need and save the changes. Now you can see it top of the sidebar.

For example I add a HTML/Javascript (1st→ 'awesome instrument') gadget to my sidebar  

blogging tips

→ Now go to Edit HTML. Scroll down to where you see like this ... for find the your wedge Name see here

blogging tips

→ Copy the name of the first Gadget. (In my case it is HTML2)
→ Now click on "Edit HTML" and find the your Gadget Code {like>> HTML2}

→ Copy and paste <b:if cond='data:blog.url == data:blog.homepageUrl'> and </b:if>
Exactly at the same place as shown in the Image below,
blogging tips

→ Now save your Template and you are done. 
give one smile :)


Add Best Image slider on your Blogger

best image slider for blogger It is said that figure speaks itself. So to make our blog or site beautiful and attractive, we should use proper photos, color and layout. Sliders is one of the most used technique to show the highlight of a particular site, but blogger has not facilitated in default.
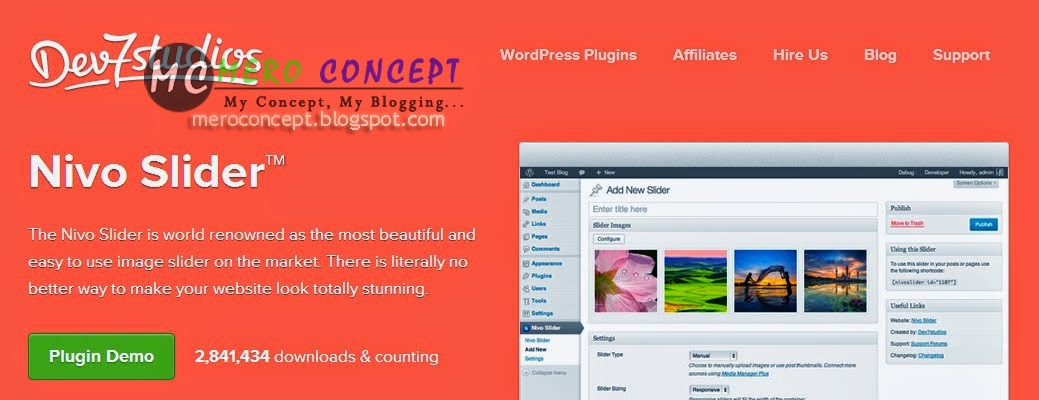
But don't worry, we are here for more and more information to make your blog good and beautiful. Today, I am here for a outstanding slider for bogger. This slider was made by www.dev7studios.com/nivo-slider/ using javascript and css. Here is the blogger version of this slider. This is really an awesome image slider.
I always said all of you not to change any code from your template without keeping back up your template but now this is not necessary because we do not enter into our edit html page


You have not do any coding for this sliders. Just copy the code that given below and follow the following steps:-


Step 1: Log into your blogger and then click on Layout 
Step 2: When you enter into layout, there you see layout of your blogger. Now Click on Add Gadgetbutton and Select the Html/Javascript.
Step 3: Now Paste the given code into HTML/JAVASCRIPT.


<style type="text/css">
/* meroconcept.blogspot.com - Basic Style */
 body{
background: transparent;
font:15px/2 'Adobe Caslon Pro', Georgia, Serif;
margin:0;
padding:0;
}
a{outline:0 none}
#pagewrap{
margin:10px auto;
padding:0;
position:relative;
height:400px;
width: 640px;
}
#slidewrap{position:absolute;}
#slider {
    border-color: #c0c0c0;
    border-radius: 5px 5px 5px 5px;
    border-style: solid;
    border-width: 10px 10px 30px;
    box-shadow: 0 0 3px #2F2F2F;
    height: 280px;
    margin: 10px;
    position: relative;
    width: 600px;
}
#slider images{
    position:absolute;
    top:0px;
    left:0px;
    display:none;
}
/* The Nivo Slider styles */
.nivoSlider {
position:relative;
}
.nivoSlider images {
position:absolute;
top:0px;
left:0px;
}
/* If an image is wrapped in a link */
.nivoSlider a.nivo-imageLink {
position:absolute;
top:0px;
left:0px;
width:100%;
height:100%;
border:0;
padding:0;
margin:0;
z-index:6;
display:none;
}
/* The slices and boxes in the Slider */
.nivo-slice {
display:block;
position:absolute;
z-index:5;
height:100%;
}
.nivo-box {
display:block;
position:absolute;
z-index:5;
}
.nivo-directionNav{display:none!important}
.nivo-html-caption {
    display:none;
}
.nivo-caption{
position:absolute;
right:20px;
text-align:center;
top:130px;
width:192px;
z-index:60;
}
.nivo-caption p{margin:0}
.nivo-caption .title{font-style:italic}
.nivo-controlNav {
    bottom: -23px;
    display: block;
    height: 15px;
    left: 204px;
    position: absolute;
    text-align: center;
    width: 192px;
    z-index: 51;
opacity: 0.6;
}
.nivo-controlNav a{
background:transparent url(http://project.dimpost.com/image-slider/images/button.png) no-repeat center center;
display:inline-block;
height:14px;
width:14px;
text-indent:-9999px;
cursor:pointer;
}
.nivo-controlNav .active{
background:transparent url(http://project.dimpost.com/image-slider/images/button_active.png);
}
</style>
<script src="http://project.dimpost.com/image-slider/jquery-1.6.1.min.js" type="text/javascript"></script>
<script src="http://project.dimpost.com/image-slider/jquery.nivo.slider.pack.js" type="text/javascript"></script>
<script type="text/javascript">
$(window).load(function() {
$('#slider').nivoSlider();
});
</script>
<!--[if IE]>
<script src="modernizr-2.0.min.js"></script>
<![endif]--> 
<div id="pagewrap">
<div id="slidewrap">
<div id="slider">
<!--code taken from meroconcept.blogspot.com
<a href="your-blog-address-here" target="_blank"><img alt="" title="#caption1" src="Image URL gose here" /></a>
<a href="your-blog-address-here" target="_blank"><img alt="" title="#caption1" src="Image URL Gose here" /></a>

</div>
</div>
</div>


Step 4: You should place your blog URL in your-blog-address-here. and place your image link in red colored image link

How to Increase Alexa Rank for Your Website, Blog?


Hello friends today we are sharing with you "How to increase Alexa Rank for your Website, Blog?"
Now days alexa has become a hot topic that how we can increase alexa traffic for a website or blog. My clients are also asking me what is the alexa rank of their website most of them are believing that alexa is ranking.

What is Alexa Rank?

Alexa.com is a web "information company". Alexa Estimates Alexa Rank of every websites and blog based on their traffic and some other factors like visitors and backlinks. alexa rank gets update on daily bases.

Factors Which Estimates Alexa Rank
  • No. of Pages Visited
  • No. of Pages Viewed by user after visiting your site.
  • Site Performance- Maintenance, Reduce 404 Pages errors
  • Social Reach and RSS Syndication

Factors which increase your Alexa Rank
  • Install Alexa Toolbar: Install the alexa toolbar on your browsers ( Chrome Or Mozilla Firefox ). Try to visit your site from that installed browser.
  • Claim your site or blog: To gain traffic over your site.Claim your site on Alexa.com.This will help alexa to know who owns the site and helps you in ranking better on Alexa.
  •  Put Alexa Raking Widget:  Put alexa ranking widget on your website or blog.
Get more information on Alexa rankings at this linkhttp://www.alexa.com/help/traffic-learn-more
Please like our facebook page and keep Visiting Our Blog .

How to Add Facebook Like box for Blogger Blog ?

Adding Facebook Like Box to blog or website helps in building your blog fame in social network sites . Facebook like box not only brings likes but also increases referral traffic for your blog or website . Blog templates comes with huge coding , It would be difficult to add a codes for facebook like box in template for a normal person . We found a simplest way to add facebook like box for blog or website . Facebook like
box can be added with an iframe tag <iframe> . These iframe tags load fast so that there is no effect on your blog loading time . In this tutorial I will be showing your how to add facebook like box for Blogger blog or website ?


Steps to Add facebook Like box :

  •     Login into your blogger account .
  •     Navigate to blogger-->Layout .
  •     Click on add a Gadget and select HTML/Javascript widget .
  •     Copy and paste the below code in the widget .
widget .
  <iframe src="//www.facebook.com/plugins/likebox.php?href=https%3A%2F%2Ffacebook.com%2Fmeroconceptblog&amp;width=300&amp;height=290&amp;colorscheme=light&amp;show_faces=true&amp;header=true&amp;stream=false&amp;show_border=true&amp;appId=399445663468890" scrolling="no" frameborder="0" style="border:none; overflow:hidden; width:300px; height:290px;" allowTransparency="true"></iframe>   

        
  •      Replace meroconceptnlog in the above code with your facebook page id .
  •     Click on save Button in the widget . Once the widget is saved you can find your facebook Like box in your blog .

Tips :
1. It is always better to add facebook like box widget in sidebar or footer .
2. The above Facebook like box looks in the form of square . You can even change the dimension by changing height and width from the above code .
3. By adding Facebook like box widget your facebook page receives more number of likes from new visitors of your blog or website .

How to remove "Powered By Blogger " Gadget

  1. Go to dashboard/ template/ edit HTML
  2. Click the 'Expand Widgets Templates' box
  3. Remove the following code From your HTML File 


      <!-- outside of the include in order to lock Attribution widget -->
      <b:section class='foot' id='footer-3' showaddelement='no'/>


<b:widget id='Attribution1' locked='true' title='' type='Attribution'>
<b:includable id='main'>
    <b:if cond='data:feedbackSurveyLink'>
      <div class='mobile-survey-link' style='text-align: center;'>
        <data:feedbackSurveyLink/>
      </div>
    </b:if>

    <div class='widget-content' style='text-align: center;'>
      <b:if cond='data:attribution != &quot;&quot;'>
       <data:attribution/>
      </b:if>
    </div>

    <b:include name='quickedit'/>
  </b:includable>
</b:widget>

save template you are done .

Cheers ..!!! 

How to add gadget by label manage your Recent posts ?

Hi friends I'm going to teach you one of simple gadget for your blog. Come with me step by step.
How to add gadget by label your Recent posts


1.1st Go to the Layout>Add a gadget>HTML/Javascrit
2.Enter the label Title On your Gadget Title.
3.Copy the below code and paste inside the content box


<!-- Recent Posts by Label Start -->
<!-- code by MeroConcept -->
<script type="text/javascript">
function recentpostslist(json) {
 document.write('<ul>');
 for (var i = 0; i < json.feed.entry.length; i++)
 {
    for (var j = 0; j < json.feed.entry[i].link.length; j++) {
      if (json.feed.entry[i].link[j].rel == 'alternate') {
        break;
      }
    }
var entryUrl = "'" + json.feed.entry[i].link[j].href + "'";//bs
var entryTitle = json.feed.entry[i].title.$t;
var item = "<li>" + "<a href="+ entryUrl + '" target="_blank">' + entryTitle + "</a> </li>";
 document.write(item);
 }
 document.write('</ul>');
 }
</script>
<script src="YOUR_BLOG_URL/feeds/posts/summary/-/YOUR_LABEL?max-results=SHOW_HOW_MANY_WANT TO SHOW&alt=json-in-script&callback=recentpostslist"></script>
<span style="font-size: 80%; float:right;">Get this <a href=" http://meroconcept.blogspot.com/2013/11/how-to-add-gadget-by-label-manage-your.html">Widget</a></span>
<!-- Recent Posts by Label End -->


4.Now Replace YOUR_BLOG_URL here (For example -  http://meroconcept.blogspot.com
5.Replace  YOUR_LABEL. Make sure you get it right?? 
6.Replace your value  SHOW_HOW_MANY_WANT TO SHOW  upto 100 post in same lable.
7.Above titles are bulleted due to the order list <ul> if you want them numbered you just replace ul with ol

  • If you want to add more then one gadget then not important put all Code
Just put this code on you gadget ( HTML/Javascript )

<script src="YOUR_BLOG_URL/feeds/posts/summary/-/YOUR_LABEL?max-results=SHOW_HOW_MANY_WANT TO SHOW&alt=json-in-script&callback=recentpostslist"></script>
<span style="font-size: 80%; float:right;">Get this <a href=" http://meroconcept.blogspot.com/2013/11/how-to-add-gadget-by-label-manage-your.html">Widget</a></span>


  • Make sure your first list(which contains the full code)is positioned on the top of all over list.


Happy Bloging !! :)
Back To HOME

Please like our facebook page and keep Visiting Our Blog .

5 Top Free premium Blogger Template

Hello to all visitors are you a blogger?  And you want to make your blog attractive ? 100% any one want to make there won blog looking very attractive, beautiful  and loading fast . So you searching these type of blogger Template Then you came in right Place . Here are some collection of most responsive and best SEO optimize fast loading  Blogger.  Lets check and  Download  Them . I foud these at Sora Templates .

1. Alyeska II Blogger Template

alyeskaII_blogger_template
Alyeska II Blogger template is one of the most beautiful templates for Blogger I have ever seen. The beautiful slider on homepage will catch your sight immediately. Additionally, social profile icons are beautifully stacked at the top. Moreover, the background and other features of the template are also cool.

View Live Demo  | Download Template


2. Rocket Blogger Template

rocket-blogger-template
Rocket Template is yet another high quality and SEO Friendly Blogger Template. The sticky sidebar navigation makes it different from other common Templates . 

3. Jarid Blogger Template

jarid-template
JAIRD  is a three column template. The beautiful slider on homepage along with beautifully arranged posts with thumbnails of Jarid template will give your blog a decent look. Apart from this, the navigation is styled with CSS which gives beautiful effects on hovering. Cool social icons are also placed on sidebar. All these make Jarid a perfect template for any blog.

4. Accord Blogger Template

accord-blogger-template
Accord is a clean white template with a cool layout. The beautiful layout of homepage displays posts with thumbnails and captions in a cool pattern. You will surely like this beautiful and simple template and will choose this for your blog.

5. Confidence Blogger Template

/>
confidence-blogger-template
Confidence is our last choice for your Blogger blog. The template has a beautiful slider on homepage with decent caption. Posts are arranged beautifully. Sidebar has attractive social icons and the navigation is brilliant.

These were our selected five top templates for your Blogger blog. I hope you will surely love them. Don’t forget to share your thoughts in comments. And if you have any problems leave comment below.

Happy Bloging !! :) 
Please like our facebook page and keep Visiting Our Blog .

How to change blogspot Address ??

So if you have a blog in blogspot domain and have an address that is not much related to the topics you write, you can change it always from the blogger dashboard. There is no restriction from blogger about the number of times you can change the URL of your blog. So if you think the blog address is not an easily recognizable one or the blog address does not tell the real niche of the blog, you have the full freedom to change the blog address. The point we should remember is this facility depends on the availability of blog URLs. It means if the address you are seeking for is already taken, you cannot use that address for your blog.

Steps to Change Blogger Blog Address
  1. Log in to Blogger account

  2. Click on Settings

  3. Under basic settings you can see an edit button near blog address.
    how to change the address of a blogger blog

  4. Click edit and change the current blog name with the new name. Click on Save after completing the process.
  5. You have done. :) 
Happy Bloging !! :)
Back To HOME
Please like our facebook page and keep Visiting Our Blog .

Finding the gadget ID

How to find the id-code for any gadget

"gadget", "widget", and even "page-element" all mean the same thing.  I generally use "gadget", because the Page Elements tab currently says "Add a Gadget".  But they're absolutely the same.


Add the gadget to your blog in the usual way.

Edit it again, but don't make any changes to it.


Maximise the window, so you can see the very end of the address bar in the window - at the top of the screen.


Notice the word at the very end of the address, ending in a number.   This is the Gadget-id.


In this example, it's Text1,   Other possible values are HTML1, Attribution1, Followers1, etc.


Picture of the widget-settings window, showing the widget-id in the browser address bar at the end of the address


What does the number mean?

The digits at the end of the widget-id show to the number of times that a gadget of this type has been added to the blog:  in a complicated situtation, with lots of gadgets of the same type, it can get into double, or even treble-figures.)

Blog Tips

तपाइँ को ब्लग Modify गर्न चाहनु हुन्छ? केहि परिबर्तन गर्न चाहनु हुन्छ ? अब मनलागी परिबर्तन गर्नुहोस Mero Concept संगै। Mero Concept कै अर्को ब्लग " Make Your Blog Uniq " मा जानुहोस् र आफुलाई के के परिबर्तन गर्न मन लागिरहेको छ सम्पूर्ण Blog Tips पाउनुहोस्।

धन्देबाद !!


Happy Bloging !! :)

Please like our facebook page and keep Visiting Our Blog .